Sunday, February 10, 2013
Papertrey Ink Sketch Challenge 1
Papertrey Ink Is celebrating their 6th anniversary this month and there are a lot of fun things to see and do on their blog. Today they are hosting a sketch challenge. Nichole drew up some fantastic sketches! I couldn't choose a favorite so I made cards with them all! Here is the first...
and here is my card...
I used the Alpha Blocks die to cut out the windows. The flower is from Flower Fusion #3 and is embossed with white embossing powder. The flags are from Heart to Heart #5. I will keep this short as I have four more posts!
Friday, January 25, 2013
Papertrey Ink January Blog Hop
This month's Papertrey blog hop is all about black backgrounds! Now normally, black is probably my least favorite color. But lately with all the "chalkboard" backgrounds being so popular, I have been liking it more and more! Add to that the fantastic inspiration photos and card examples that Nichole has shared and I was really excited to actually try and use black for my card today!
I got my order yesterday afternoon and quickly got to work so I could use my new stamps for today's hop! I used Hands of Time along with the dies and the Number Time Trio. I actually started with WHITE cardstock and embossed the clock with white embossing powder. Then I used an ink blending tool and rubbed on some Simply Chartruse ink in the center and Classic Kraft on the rest of the face. Then I inked the rest with Black. I also dyed the clock hands with ink and added a little jewel for the center. I stamped the numbers in Classic Kraft. I stamped the sentiment and overstamped it with another clock face and cut it out with a Spellbinder's circle Die. I added the card front to a Kraft card base and rounded the bottom corners. And here it is! (Click on it to if you want to see it larger!)
Thanks for stopping by and happy stamping to you!
Sunday, November 25, 2012
Papertrey Blog Hop ...November 2012
Papertrey Ink's Blog Hop.
The November blog hop challenge is to use the following picture of bookcovers as inspiration to make a card....
For my first card, I was inspired by the book titled Great Expectations. I used the same layout and colors and made a birthday card. I used only white cardstock and colored everything with Copic markers. Actually, ALL the cards I made use only white cardstock today! I popped up the letters and gift box with foam tape for a bit of dimension. For the background, I used all my grey markers and mixed them. It almost looks like a chalkboard.
The next card is inspired by the Sweet Cream Sugar Cones bookcover. Again I used all my grey markers for the background and then heat embossed the sentiments with white. For the cones, I inked my stamp first with frayed burlap, stamped off and then scattered straw distress inks.I also inked the edges and popped them up again with foam tape.
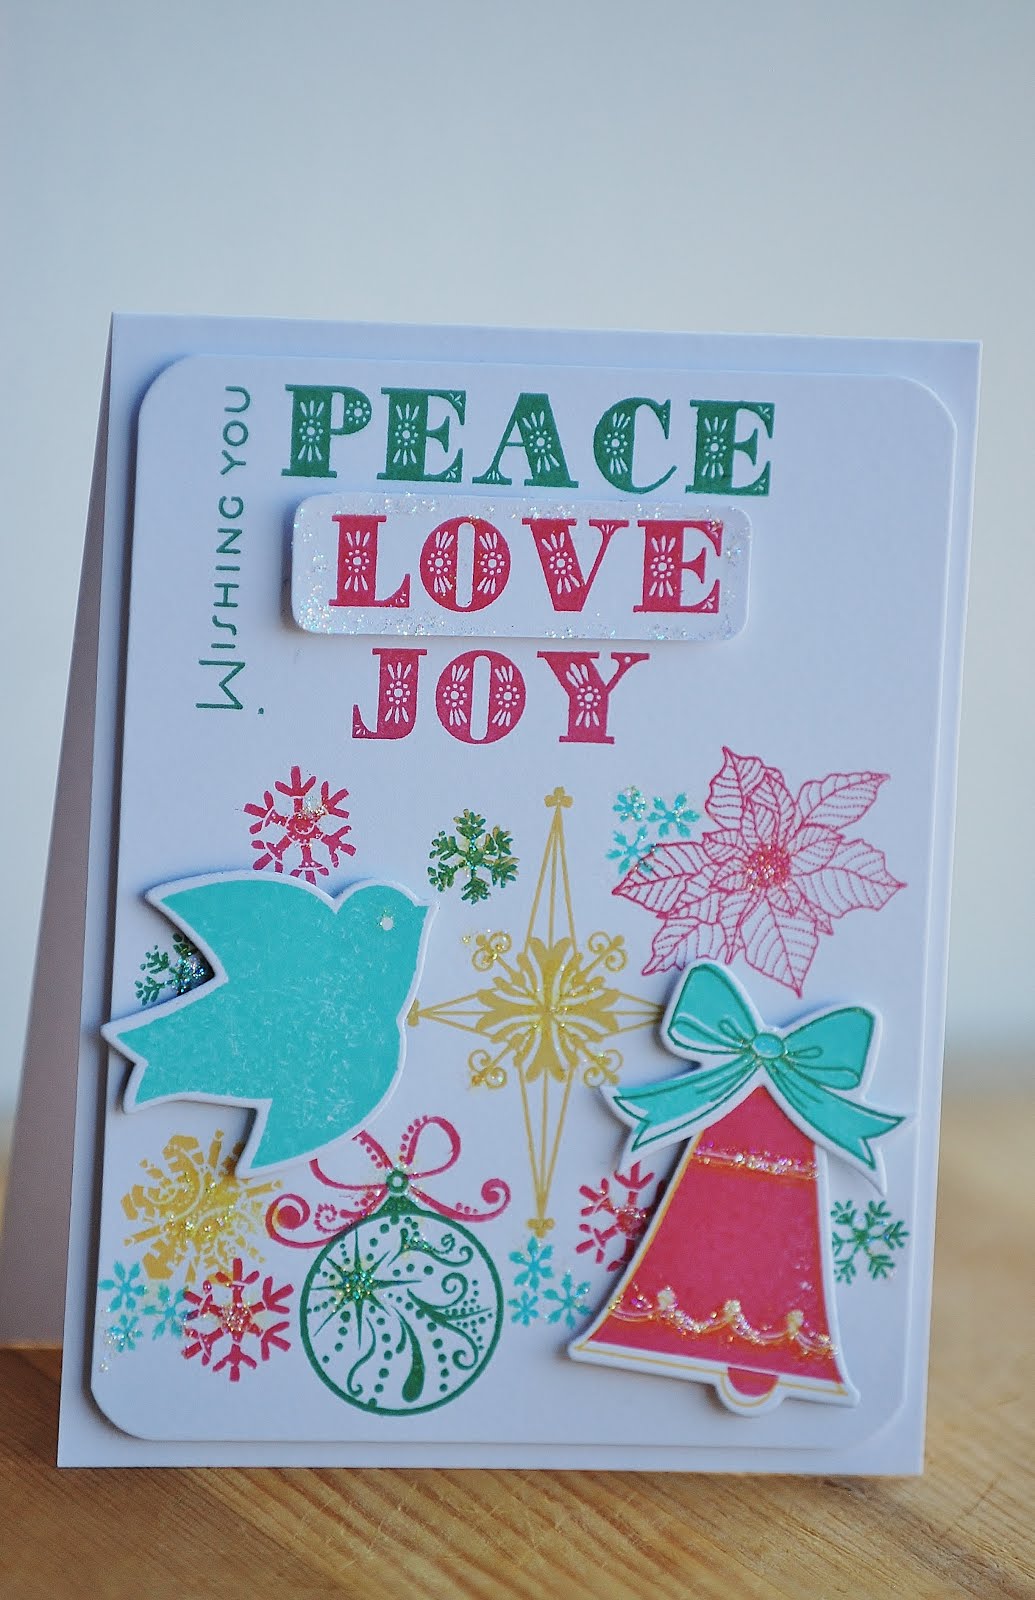
The next card is inspired by the Weekend London bookcover. I used several Christmas stamp sets and randomly made a cluster on the bottom portion of my card. I die cut the bell and ribbon from the Bells and Boughs set and the dove from Peace be Still. I added some Stickles glitter to make it sparkle.
The last card was also inspired by the first bookcover. This one, I colored different grey squares with my Copics and then stamped cupcakes with VersaMark ink and heat embossed them with white. I used a red marker for the sentiment strip (Movers and Shakers Sentiments) and added some heart gems. I finished it off by rounding the corners with my Corner Chomper.
Well that was fun! I really need to make some more birthday cards. My mom has requested them for part of her Christmas gift this year. I really had fun using my Copic markers on all these cards and I think I will try some backgrounds in other colors. Thanks for stopping by and have a great day!
Thursday, October 25, 2012
Papertrey Blog Hop October
Big post today! Big Post! When I saw the inspiration photos for Papertrey Ink's monthly blog hop, I was so inspired that instead of choosing just one, I wanted to use them all!
Lucky for me, I had a rare weekend with nothing planned so I got to make cards all day Saturday! It was so much fun and I am happy to share what I created here!
The first card I made was inspired by this photo: I don't have any stocking stamps so I was inspired by the colors to make a little winter scene.
Here is my card:
The stamps I used are from the set: In the Meadow.
Cardstock: Hawaaian Shores, Simply Chartreuse, White
Ink: Aqua Mist, Hawaaian Shores, Simpy Chartreuse, New Leaf.
I inked the tree first with Simply Chartreuse and then New Leaf just on the edges. Then I masked off the tree and ground and randomly stamped the snowflakes. I added Stickles to the snow and tree for a pretty sparkle look!
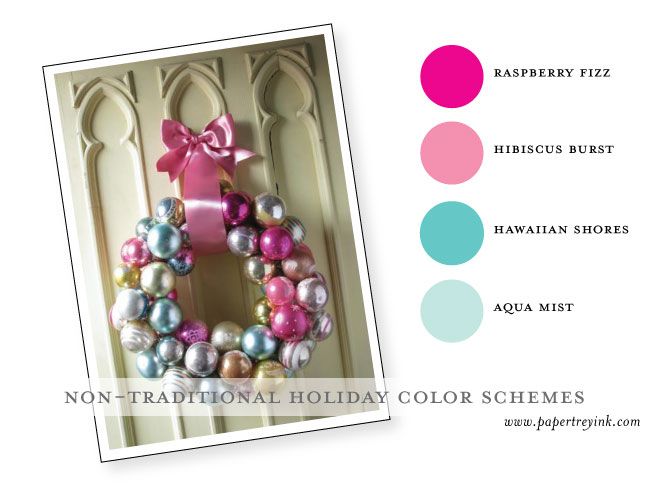
Secondly, I was inspired by this color scheme:
Stamps:Mistletoe and Holly, Tiny Treats Christmas
Cardstock: Aqua Mist, Rasperry Fizz, Hibiscus Burst Hawaiian Shores and White
Other: Cuttlebug Honeycomb Embossing Folder, Twine,Vintage Ornaments Die, Fillable Frames#10, Corner rounder.
I put a little bit of everything on this card! LOL I tried to do a shabby chic, layered card, which is not really my style. I like to try new things though and had a couple rejects on my desk to work with (the not perfect embossed paper, the embossed holly that didn't work on another card and some blank tags). I put them all together and got this:
Third Color Scheme:
Stamps:Mistletoe and Holly.
Cardstock: Pinefeather, Pure Poppy, Ocean Tides, Vintage Cream.
Other: Corner Chomper, White Embossing Powder.
At first I embossed the holly onto the stripes but it didn't look right so I embossed it again on Pinefeather paper and cut it out. I didn't realize the little holly berries were attached on the stamp and have since cut them apart. I left them there on this card there on the bottom but think it looks weird. I have the dies for this set on my wishlist!
Fourth Color Scheme:
Stamps: Wonderfully Whimsical, Tiny Treats Christmas, Tag Its #8.
Cardstock: White, Melon Berry.
I love that inspiration photo! Such a happy little scene and I wanted to create my own little frosty wonderland with my stamps! I mixed a few stamp sets to create the background and had fun coloring it in with Copic markers. Then I filled any open space and used white embossing powder on the little snow flurries. I added Stickles to the snow, trees, and little heart on the house for a little extra sparkle.
5th Color Scheme:
What? No stamps?! I just realized as I am typing this there are no stamps! Let me check again! Nope! None! Weird! haha I think this is a first!
I really liked the inspiration picture and thought it looked super cool but had no idea how to incorporate that look into a card. First, I cut out some letters and just started playing with them and this is what I came up with. Again, not my style, but I had fun trying!
Last Color Scheme:
I LOVE this photo! My mom taught me how to knit when my first child was born. I am not as accomplished as she is, but every once in a while I will get out the needles and relax. I only make baby sweaters and booties and such because I get bored with large projects...but I digress...
I ordered the knitting stamp on release day and have been waiting for my order to arrive. I don't know why, in 2012, it should take 10 days to get here? It is not like we live in another country or remote place. (I am just outside of L.A.) Every month, it takes at least 10 days and I never get to use my new stamps for the blog hop! So frustrating but I DO LOVE the stamps!Ok now I must apologize for ranting! LOL Anyway, I am going to hope they come today and will make my card and post as soon as I do. So come back this weekend to see how the last picture inspired me! Have a great day!
Monday, September 3, 2012
Moxie Fab Word Minty Fresh Challenge
First thing I thought of when I saw Minty Fresh challenge was ICECREAM! Mint chocolate chip is my favorite! I think these two make a very cute couple!
I used my Papertrey Ink stamp set called Sweet As Can Be with it's matching dies. I stamped the background and it was too harsh so I inked up the stamp and stamped it on spare paper and then stamped on my card for a softer look. I embossed the white background rectangle with an impression plate to match the look of a cone. I added faces with a Lawn Fawn stamp set. It was a smiling band-aid from On the Mend,but I only inked up the face. The bow is from Love and Breakfast and I wanted the sentiment to say MINT in it so I used Harold's ABC's and Smitty's ABC's.
I liked this little couple so I made another...
This one, I used the Papertrey sentiment and added some Stickles to make their bows sparkle a bit. Love these challenges. I like how they push me to try things I never would have thought to do!
Saturday, August 25, 2012
Papertrey Ink Blog Hop August 2012
This month's Papertrey challenge is to make a card that was inspired by this picture..
I got my order in time to use my new herrigbone stamps and created these...
For the first card, I used several colors of distress inks and stamped the 2 smaller herrigbone stamps randomly for the background onto Rustic Cream cardstock. I took a smaller piece and ran it through my BigShot with the herringbone impression plate. I stamped the tree from the Teach and Inspire set and outlined the edge with a copic marker.
This next card was fun to make. I always have fun playing with embossing powder! It may be silly, but I just love watching it melt and turn shiny! Every time I am amazed! haha. I stamped the large herringbone onto another sheet of Rustic Cream cardstock with clear embossing powder. Then I rubbed some distress ink onto it. You might not be able to tell from the picture, but I used several different shades of brown. One for each stripe. I like how rustic this card turned out. I needed a manly focal point so I used the deer from In the Meadow. (he seems manly to me)
Here is a closeup of Mr.Manly Deer...
I have a busy busy day ahead of me, so I better get off here quick. I hope you have a wonderful weekend!
Monday, August 13, 2012
Tuesday Trigger/ Type Hype
The Tuesday Trigger on the Moxie Fab Blog was this cool typewriter and I thought I would make a little card inspired by it's awesomeness!
I bought these little type key stamps from Michael's last week from their dollar bins. I know dollar stamps are not all that great quality but I thought they were so cute and picked em up anyway! I thought they went well with this snazzy little typewriter stamp from Hero Arts. I just used a marker to write "Missing U" and plan to send this to my daughter who is far away at grad school just to let her know that I am thinking of her...always.. :-)
I added some Glossy Accents to the hearts. The typewriter and hearts are popped up with foam tape.
I have a bunch of other cards to make. I am sooo behind. I should just make a bunch of belated cards! I am pretty sure not a whole lotta people visit this blog, but if you did happen upon it, I wish you a happy day! Thanks for stopping by!
Subscribe to:
Posts (Atom)